Setup
Prerequisites
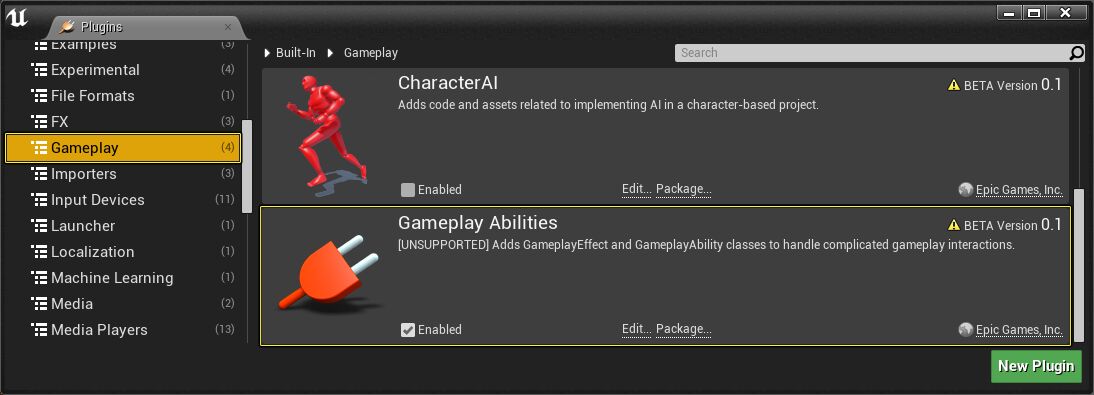
- Enable the Gameplay Ability System Plugin in the Edit -> Plugins window.
- To get the full range of capabilities of this system, add "GameplayAbilities", "GameplayTags", and "GameplayTasks" to PublicDependencyModuleNames in your project's "(ProjectName).Build.cs" file.
To use the Gameplay Ability System, add the three module names anywhere in the braced list, as follows:
PublicDependencyModuleNames.AddRange(new string[] { "GameplayAbilities", "GameplayTags", "GameplayTasks" });
Setting with a fresh project
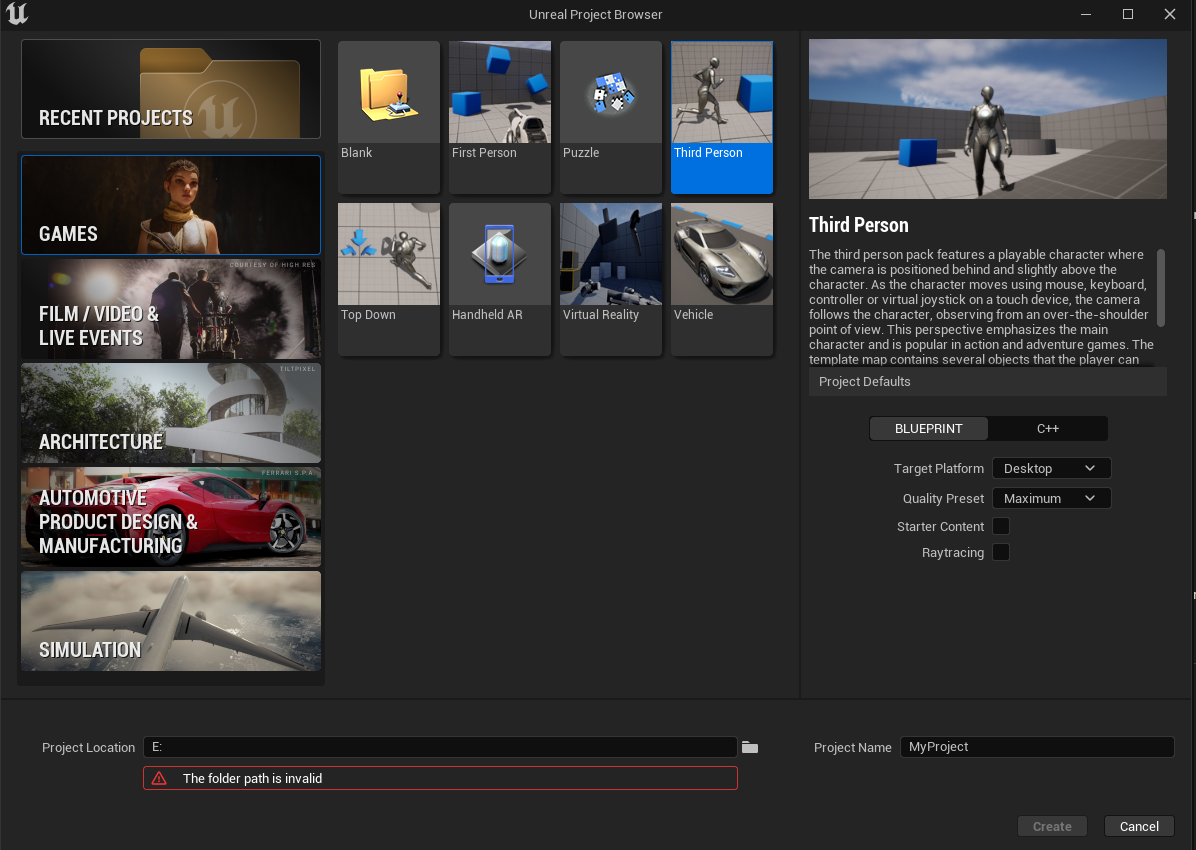
In this setup, we will be using the Third Person BP template for our initial project setup.
-
Create that project by launching the Unreal Engine instance and choose Third Person Project with Blueprint as the project default.
-
Set your project location and name your project and create the project.
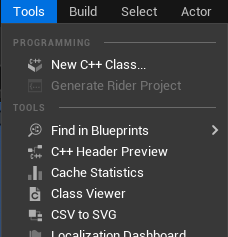
- Go to
Tools->New c++ classand findUAssetManagerand create your assetmanager.

- Open your IDE and add this code in your header and cpp file.
Header:
public:

    static UMyAssetManager& Get();

    /** Starts initial load, gets called from InitializeObjectReferences */
    virtual void StartInitialLoading() override;
CPP:
#include "AbilitySystemGlobals.h"


UMyAssetManager& UMyAssetManager::Get()
{
    UMyAssetManager* Singleton = Cast<UMyAssetManager>(GEngine->AssetManager);

    if (Singleton)
    {
        return *Singleton;
    }
    else
    {
        UE_LOG(LogTemp, Fatal, TEXT("Invalid AssetManager in DefaultEngine.ini, must be MyAssetManager!"));
        return *NewObject<UMyAssetManager>();    // never calls this
    }
}


void UMyAssetManager::StartInitialLoading()
{
    Super::StartInitialLoading();
    UAbilitySystemGlobals::Get().InitGlobalData();
}
Starting in UE 4.24, it is now necessary to call UAbilitySystemGlobals::Get().InitGlobalData() to use TargetData, otherwise you will get errors related to ScriptStructCache and clients will be disconnected from the server. This function only needs to be called once in a project.
Fortnite calls it from UAssetManager::StartInitialLoading() so thats why we do the same.
- Next, go to your
Config/DefaultEngine.iniand add this into your[/Script/Engine.Engine]
[/Script/Engine.Engine]
AssetManagerClassName=/Script/CommonExampleProject.MyAssetManager
- Find the
ThirdPersonfolder and find your GameMode class. Reparent your game mode class toCommonModularGameMode.h - Find the
ThirdPersonfolder and find your Character class. Reparent your character class toCommonModularCharacter.h - Right click, go to blueprint and create a
PlayerState class. Reparent your player state class toCommonModularPlayerState.h - Right click, go to blueprint and create a
PlayerController class. Reparent your player controller class toCommonModularPlayerController.h
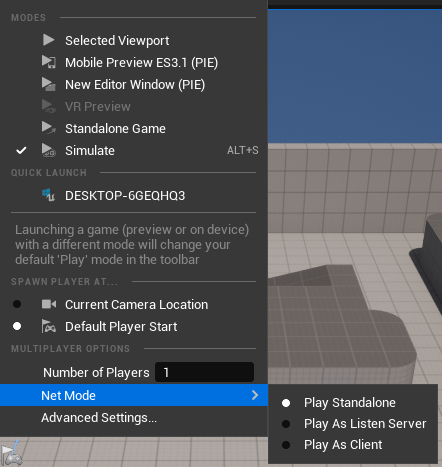
Once you finish, find the three dot near Play button, find NetMode and choose Play As Client.

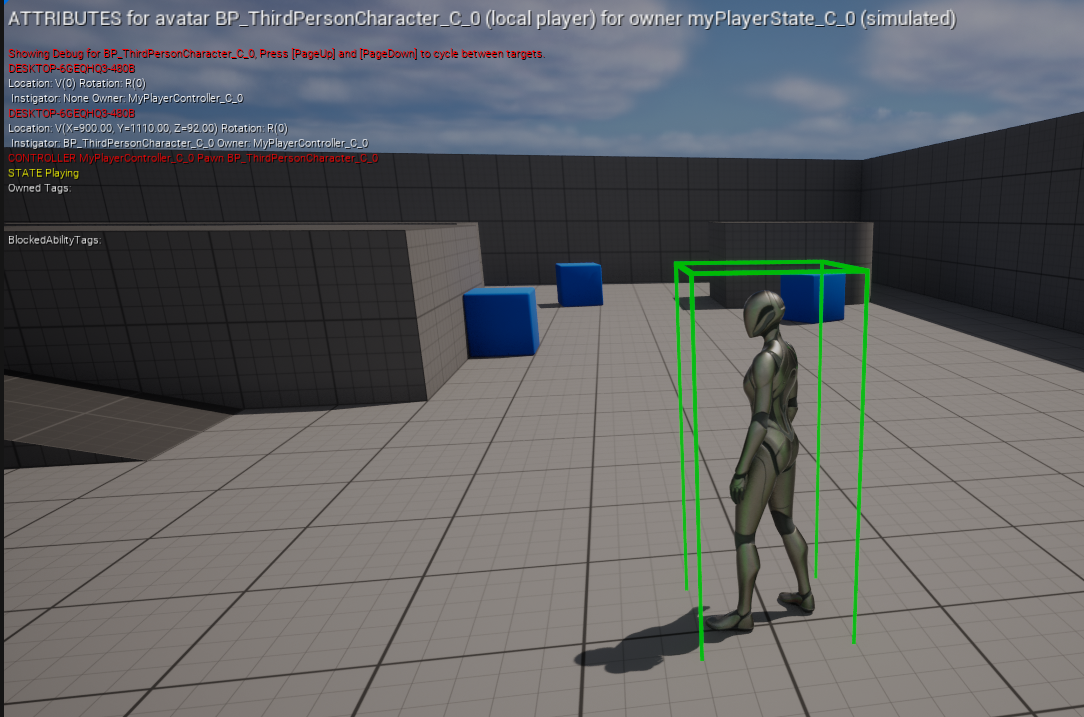
Then, press Play. If we setup everything correctly, we should get no error.
To confirm that, enter this command into the console command showdebug abilitysystem and you will be greeted with this debug panel.
Setting up with Preexisting Project
- Go to
Tools->New c++ classand findUAssetManagerand create your assetmanager.
- Open your IDE and add this code in your header and cpp file.
Header:
public:

    static UMyAssetManager& Get();

    /** Starts initial load, gets called from InitializeObjectReferences */
    virtual void StartInitialLoading() override;
CPP:
#include "AbilitySystemGlobals.h"


UMyAssetManager& UMyAssetManager::Get()
{
    UMyAssetManager* Singleton = Cast<UMyAssetManager>(GEngine->AssetManager);

    if (Singleton)
    {
        return *Singleton;
    }
    else
    {
        UE_LOG(LogTemp, Fatal, TEXT("Invalid AssetManager in DefaultEngine.ini, must be MyAssetManager!"));
        return *NewObject<UMyAssetManager>();    // never calls this
    }
}


void UMyAssetManager::StartInitialLoading()
{
    Super::StartInitialLoading();
    UAbilitySystemGlobals::Get().InitGlobalData();
}
Starting in UE 4.24, it is now necessary to call UAbilitySystemGlobals::Get().InitGlobalData() to use TargetData, otherwise you will get errors related to ScriptStructCache and clients will be disconnected from the server. This function only needs to be called once in a project.
Fortnite calls it from UAssetManager::StartInitialLoading() so thats why we do the same.
- Next, go to your
Config/DefaultEngine.iniand add this into your[/Script/Engine.Engine]
[/Script/Engine.Engine]
AssetManagerClassName=/Script/CommonExampleProject.MyAssetManager
- Reparent your character class to CommonModularCharacter.h
- Reparent your player controller class to CommonModularPlayerController.h
- Reparent your player state class to CommonModularPlayerState.h
- Reparent your game mode class to CommonModularGameMode.h
To see if you configured CommonGAS correctly, go to the command bar and use the following command:
showdebug abilitysystem
Using Enhanced Input System
From Unreal Engine 5.1 onwards, the EnhancedInput plugin will replace the legacy input system. If your project is from Unreal Engine 5.0 and below, make sure to enable the EnhancedInput Plugin by:
Plugins->Input->EnhancedInput
By default, the Third Person template preconfigured to use EnhancedInputSystem and there's some setup configured.
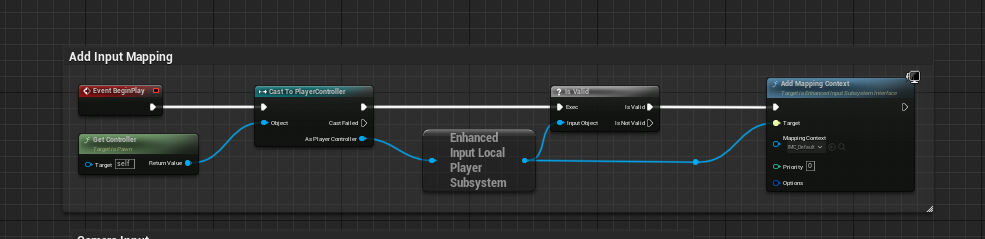
We can just use the preconfigured Binding system on BeginPlay or using CommonAbilityInputBinding component.In this setup, we want to use the component as it comes with some convenience functions for input binding.
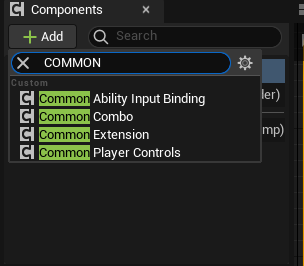
- Find your blueprint character class and open it
- Go to the Component Section and Add the CommonAbilityInputBindingComponent
We can delete the BeginPlay setup and use the component to bind our input mapping context.
The Third Person template also comes with preconfigured InputActions and InputMappingContext in ThirdPerson/Input folder.
- Find CommonGAS ->PlayerControls category and configure your Mapping Context by using the
IMC_Defaultthat comes with the template
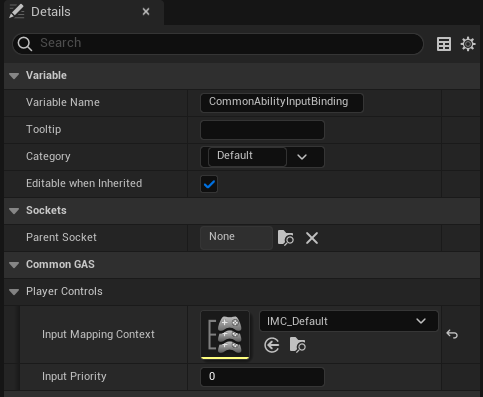
What this component does is essentially the same with what the BeginPlay event does above.
Note:
In the future, im planning to revamp this system so you can configured what IMC when you're enter the Death event and what IMC you will rebind for Death and Respawn system
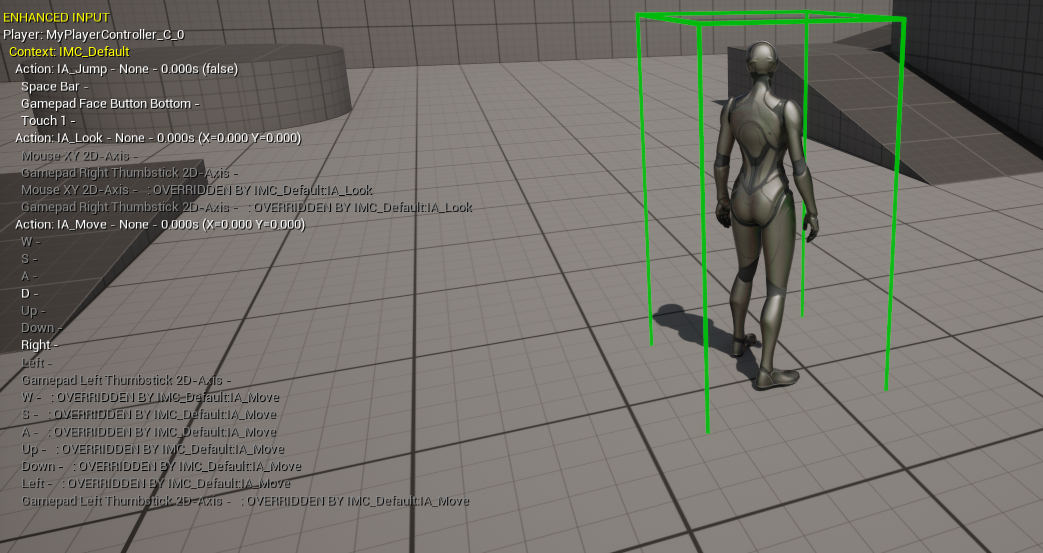
To see if you configure Enhanced Input correctly, go to the command bar and use the following command:
showdebug enhancedinput